Help centre
Illustrated, step-by-step guides for every section of the workspace.
Choose a source
Every diorama starts either from a real place or from a picture.
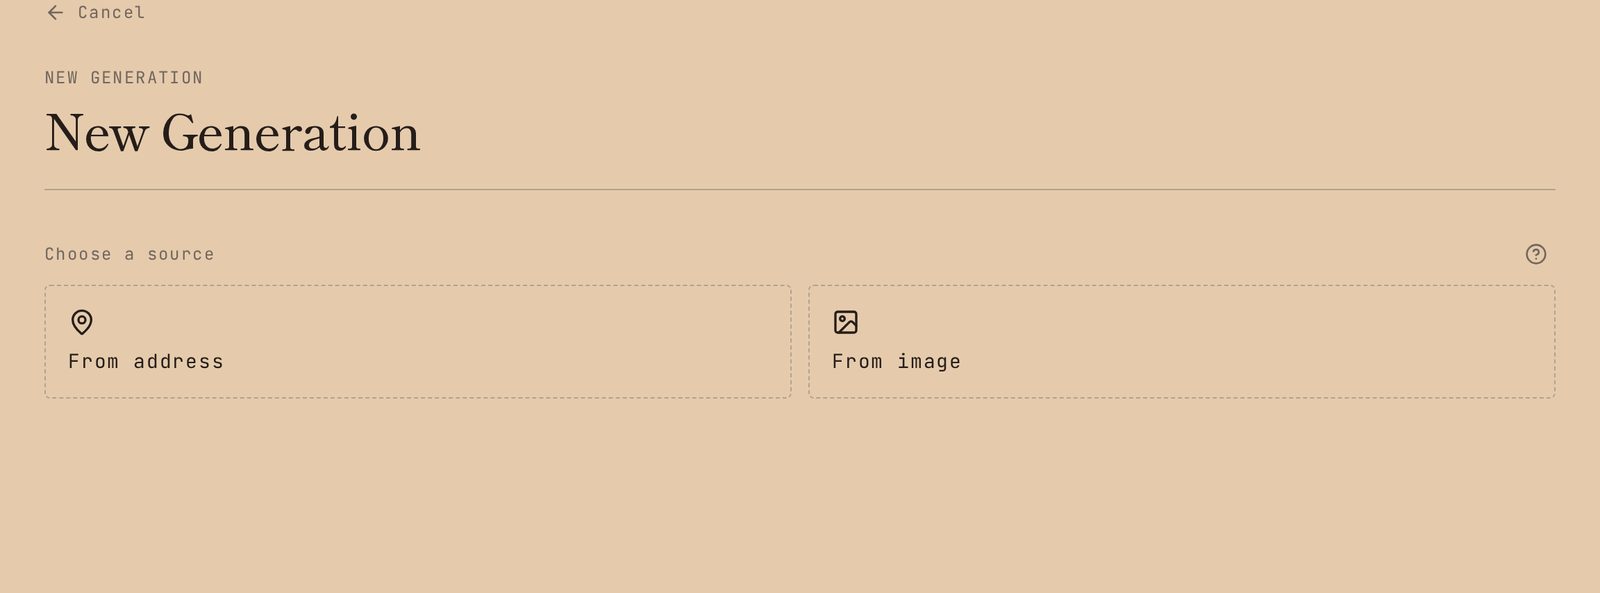
- 1From an address: we look up the real building and rebuild it. Best for Japanese addresses and landmarks.
- 2From an image: upload one clear photo of a building and we generate a model from it. Best when the building isn't in the map data.
- 3Pick one to continue — you can always start another generation with the other source.
Tip: Not sure? Try the address flow first; it needs no photo and gives the most accurate proportions.
Generation details
Basic information for the generation you're about to create.
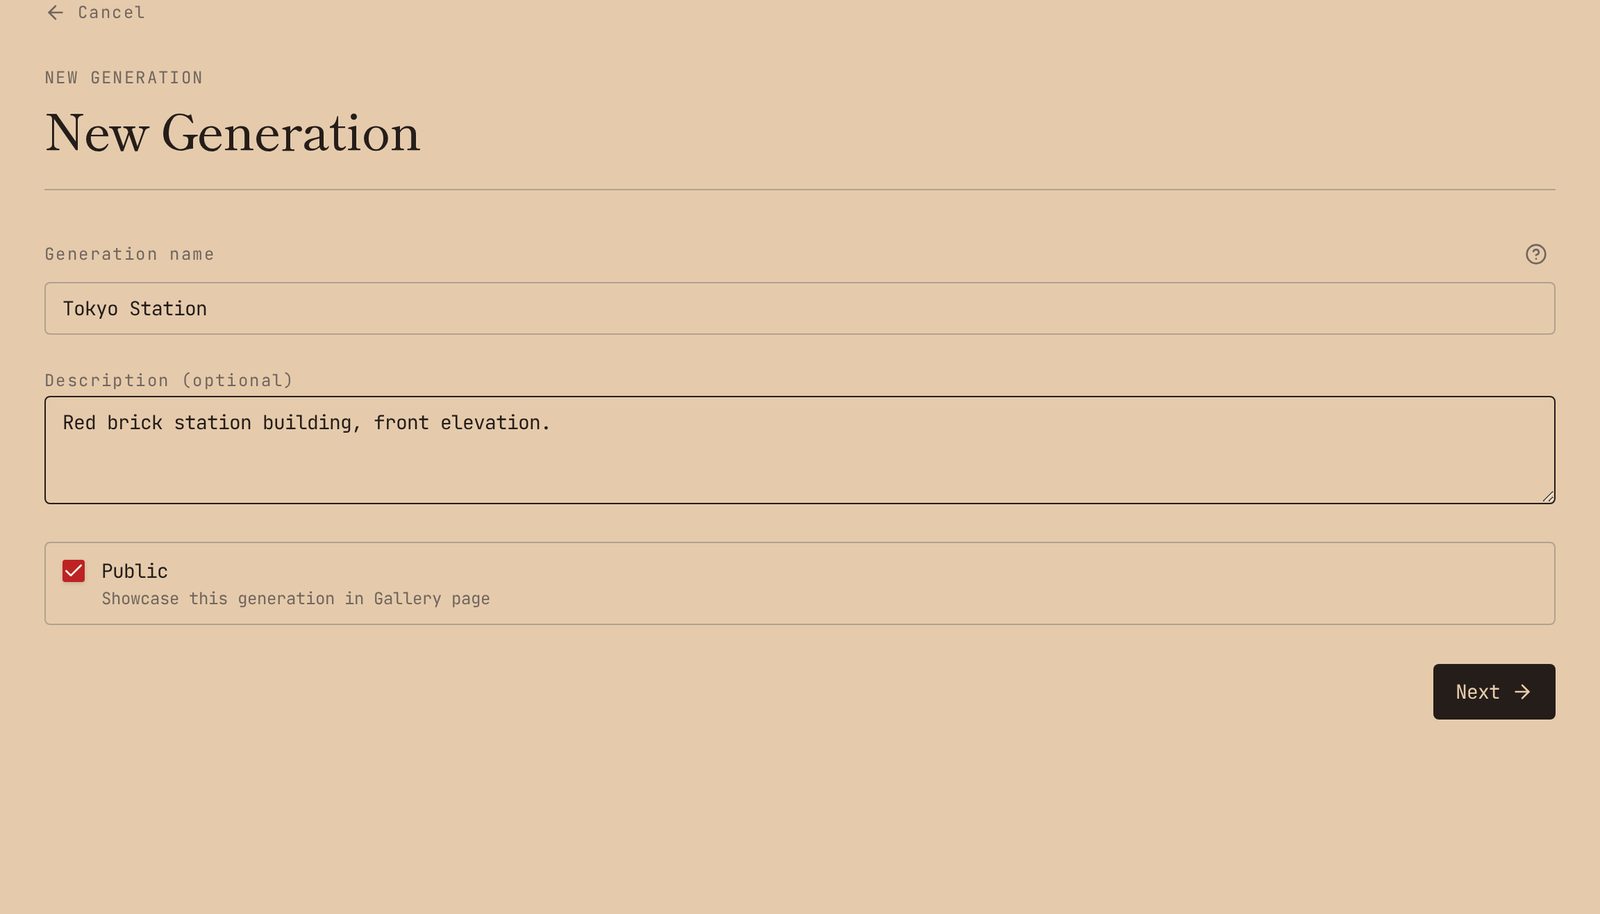
- 1Name is required and is what you'll see in My generations and in the gallery.
- 2Description is optional — a short note about the building or the place.
- 3Public shows the finished diorama in the gallery so others can view and remix it. Uncheck it to keep the generation private.
Tip: You can rename the generation or change its visibility later from the Details tab in the workspace.
From an address
Find the real building on the map and confirm it to create the generation.
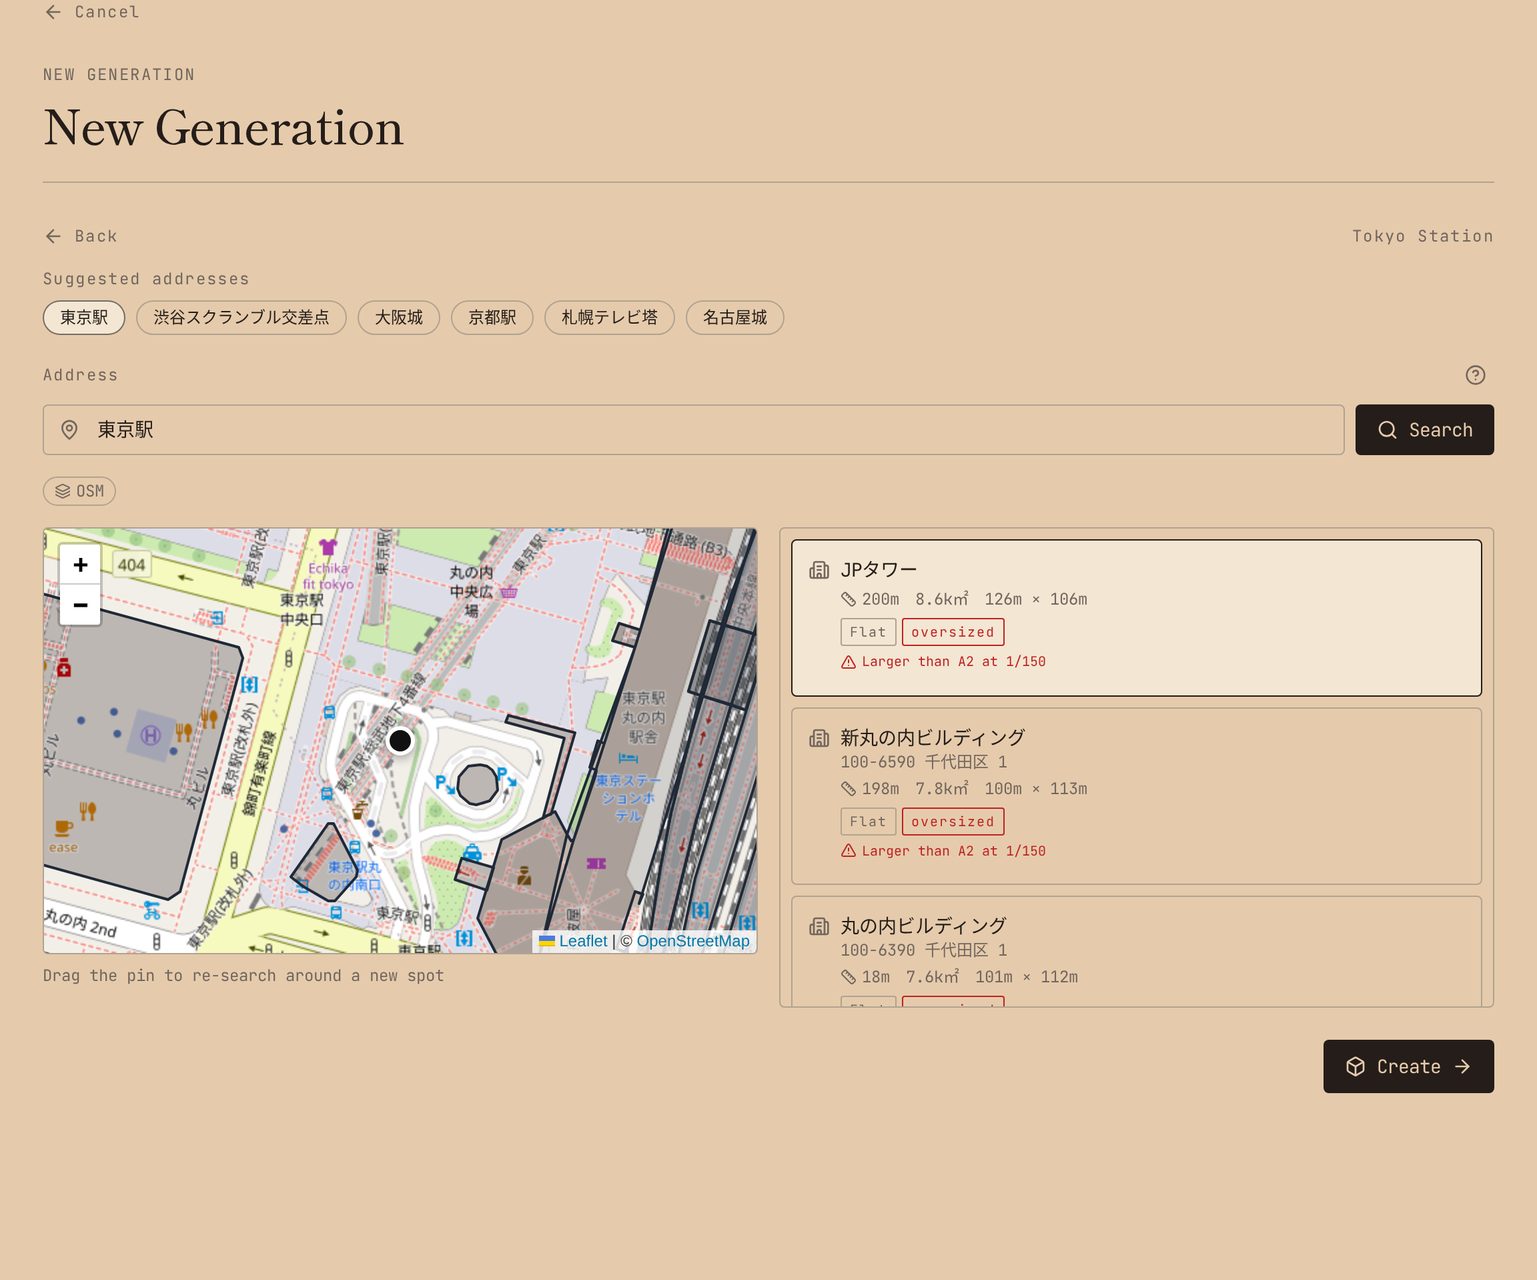
- 1Type an address or place name, or tap one of the suggestions, then search.
- 2Pan and zoom the map until the building you want is in view.
- 3Click the building to select it — the 3D preview shows what will be generated.
- 4Press Create to build the generation from that building.
Tip: Coverage comes from Japan's 3D city data, so some buildings may be missing. If yours isn't there, use the image flow instead.
From an image
One photo becomes a 3D model, then a printable diorama.
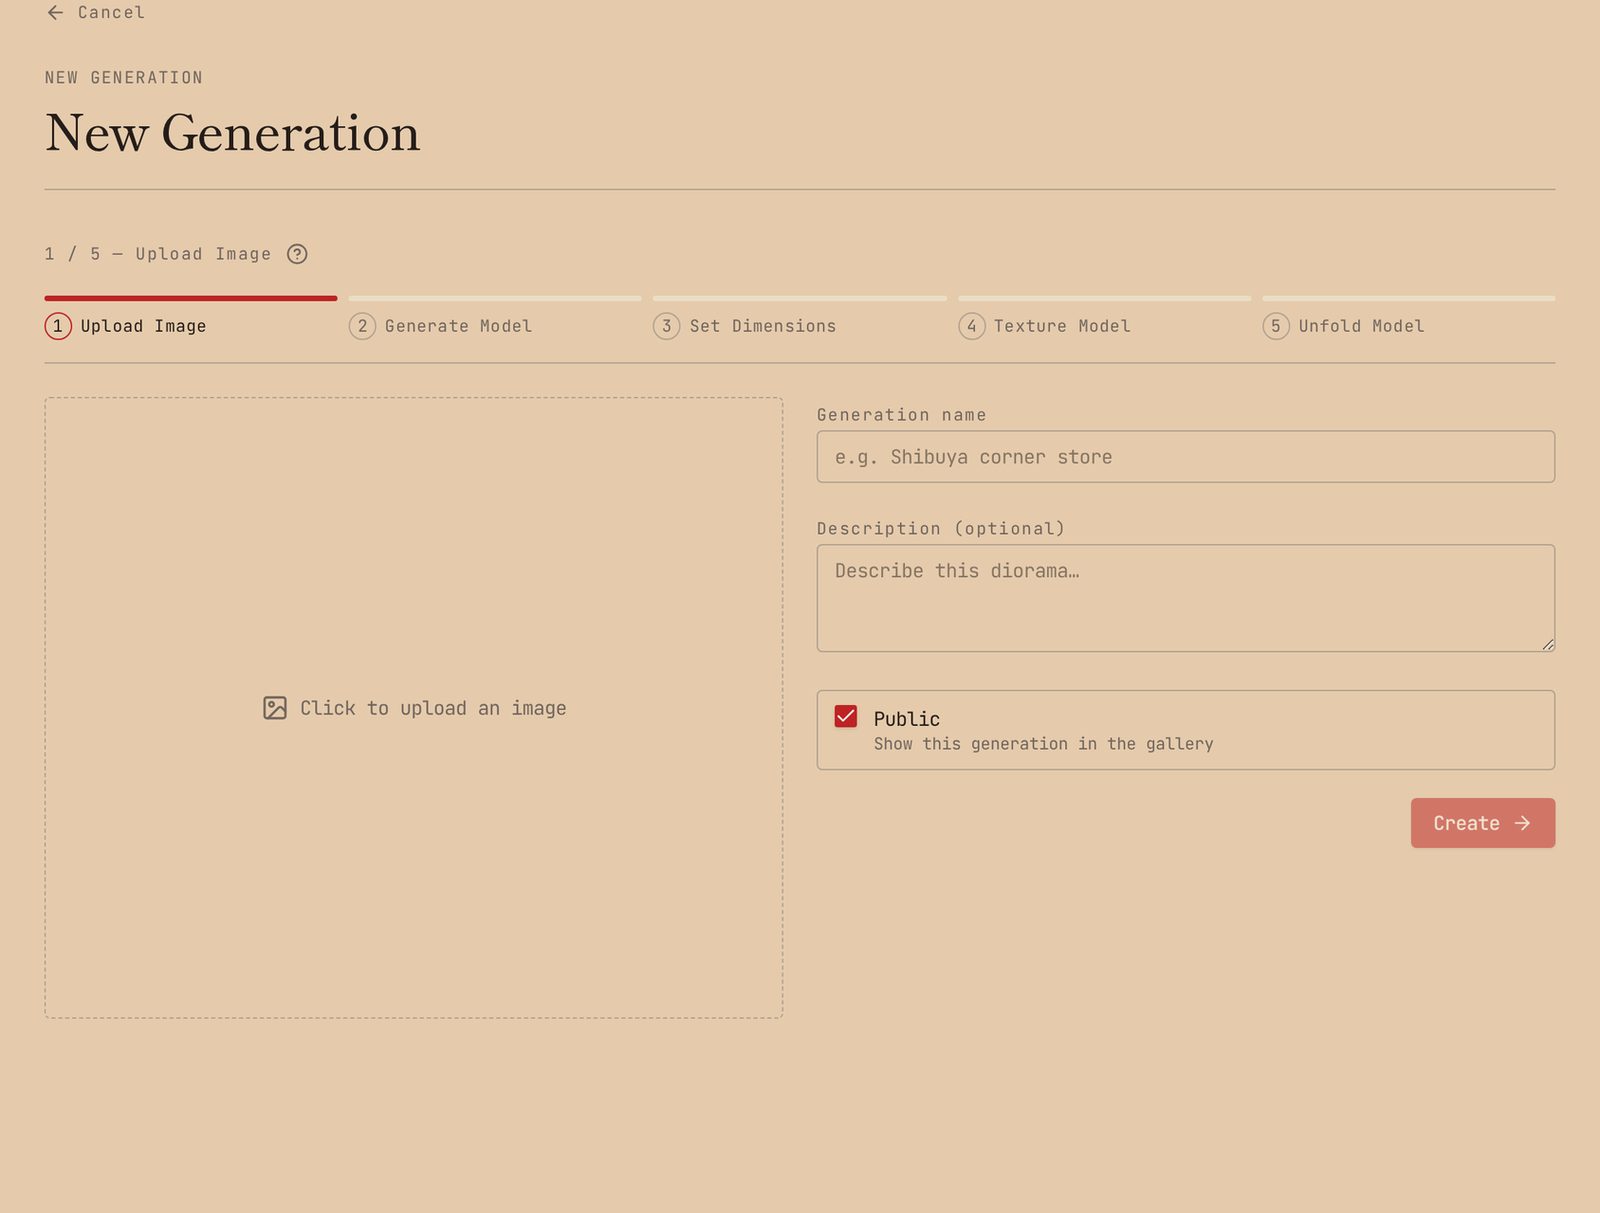
- 1Upload a single image of the building.
- 2Generate creates the 3D model — this can take a few minutes.
- 3Dimensions lets you set the real building size and scale before texturing.
- 4Texture applies the look of the building, then Unfold produces the printable sheets.
Tip: Keep the tab open while a step is running; closing it can leave the job without a result.
3D preview
Everything you build in this workspace is shown here in real time.
Loading model…
- 1Drag to orbit, scroll to zoom, right-drag (or two fingers) to pan.
- 2Use the view selector to jump to a straight-on face — handy before texturing.
- 3Fit to screen re-centres the camera if you lose the model.
- 4The scene toolbar also toggles the ground grid, opaque rendering, and whether clicking the model selects a component.
- 5Clicking a block or a part highlights it in the list beside the preview, and clicking it again clears the highlight.
Tip: The preview always reflects the Active model you selected above it.
Active model
Choose which model the tools on the right apply to.
- 1Base / textured model: the building itself.
- 2A component: a part you attached, edited on its own.
- 3Assembled model: the building with every attached part baked in.
Tip: Some tabs are disabled for certain models — switch the active model to unlock them.
Unfold
Turn the 3D model into printable, foldable sheets.
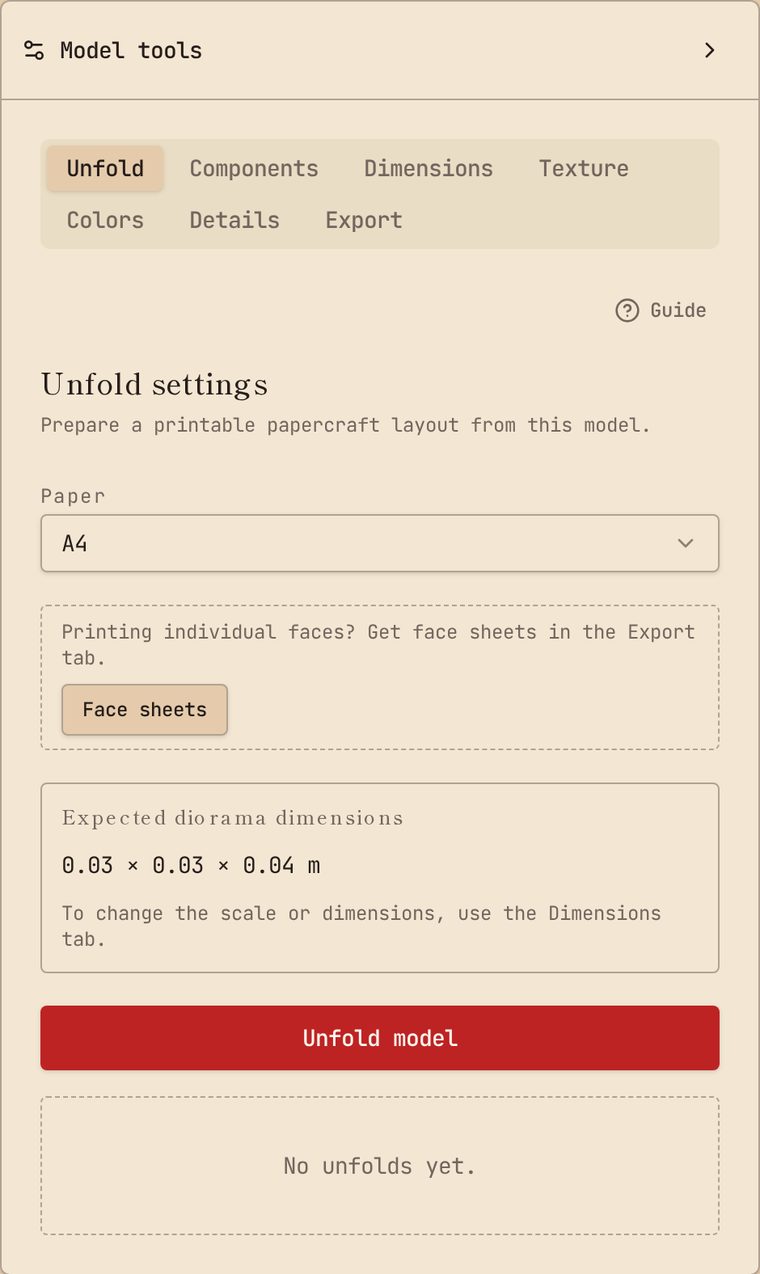
- 1Pick the paper size you will print on (A4, A3 or A2).
- 2Check the expected diorama dimensions — change scale in the Dimensions tab if it does not fit.
- 3Start the unfold and wait for the job to finish; the PDF appears in Unfold history.
Tip: Texture the model before unfolding if you want printed colours and materials.
Components
Attach extra parts — roofs, balconies, signage — to the building.
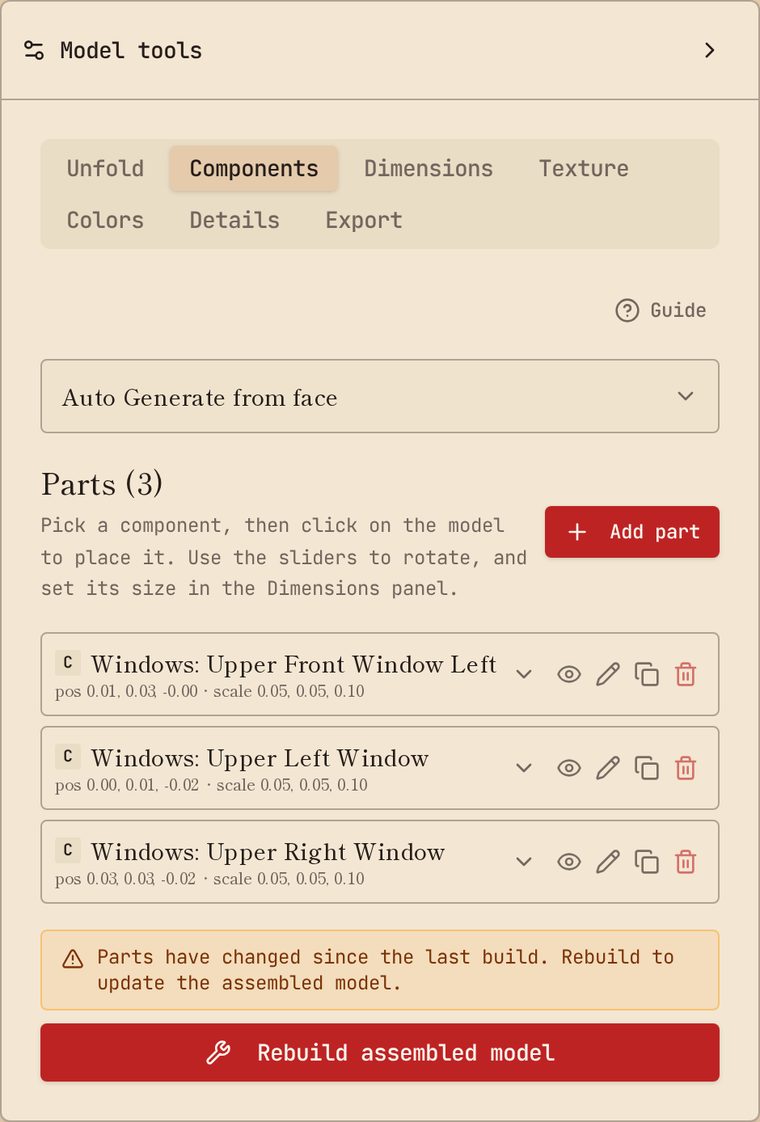
- 1Add from the library, build one from scratch, or auto-generate cuboids from a face.
- 2Position, rotate and scale the part on the model surface.
- 3The wrench icon edits a part. Library parts are forked into your own private copy the first time you edit one, so the shared library stays untouched.
- 4Use the copy icon to duplicate a part: name the copy and choose whether to switch to it straight away.
- 5Make a part the active model to cut it or refine it, exactly like the main building.
- 6Rebuild the assembled model to bake your parts into a single model.
Tip: Auto Generate From Face lets you draw several markers at once and creates a part for each.
Auto generate from face
Draw markers on one face and get a real part for each of them in one go.
- 1Choose the face (front, back, left, right or top) — the model is captured straight-on for you.
- 2Drag on the image to draw a marker for every window, door or panel you want. Markers can be moved, resized and deleted.
- 3Give each marker a name and a type (windows, doors, roofs, balconies, AC units, structural, other).
- 4Set the depth that applies to the run — 4 mm by default.
- 5Use the eye button to hide the blue markers of components that already exist, so you can draw without visual clutter.
- 6Press Generate components: one cuboid part is created per marker and attached at the position you drew it.
Tip: The assembled model isn't rebuilt automatically — rebuild it once you're happy with the new parts.
Placement on model & depth
Fine-tune exactly where a part sits on the building, and how far it sticks out.
- 1Pick a view (front, back, left, right, top). The red outline always shows the part as seen from that view — from the side a 100×50×10 mm part reads as 10×50.
- 2Drag the outline to move the part across the face. Outlines of other components stay visible but aren't clickable, so small parts are easy to grab.
- 3Click Set depth (the label itself opens it too) to open the depth picker.
- 4In the depth picker, drag the red and green lines to set where the part starts and ends, and drag the main red marker to reposition the part left/right and up/down. Zoom and pan to work precisely.
- 5In the 3D preview, use the pick-components toggle to stop clicks from selecting parts while you rotate the model.
Tip: A part placed by the Cut tool sits flush with the surface it came from — leave its depth alone unless you want it to protrude.
Cut
Remove pockets and openings from the model by drawing on a face — windows, doorways, arches, or any custom outline.
- 1Pick the face you want to cut on, then drag on the image to draw a cut marker. Draw as many as you need for one operation.
- 2Choose a shape for each cut: rectangle, rounded rectangle, circle, ellipse, semi-circle, Norman or gothic arch, triangle, trapezoid, polygon, or freehand (click points, then close the outline).
- 3Set the depth of each cut, or tick “cut all the way through” for a real opening.
- 4Use the copy icon on a cut to duplicate it with the same settings.
- 5Each cut asks whether to save the removed piece as a component. Choose Yes to keep it — it is attached back exactly where it was cut from, so you can reuse or unfold it separately.
- 6Apply the cut. On the main model you can revert to the state before the cut at any time.
Tip: When a component is the active model there is no revert, so duplicate the component before cutting it.
Refine (add depth)
Turn a flat face into a real relief mesh, so printed details like reliefs and mouldings actually stand out.
- 1Open Refine and choose the face to rebuild.
- 2Depth is sampled from the face's own image and turned into real geometry; adjust smoothing and the minimum thickness so thin areas stay printable.
- 3Compare the original and the refined model side by side in the preview.
- 4Press Accept to replace the model with the refined one, or close the dialog to keep the original.
Tip: Refine works on a component too — useful after cutting a shape out and wanting it embossed rather than flat.
Roof settings
The roof is generated to fit your building, so you never drag or scale it — pick a style, then tune the numbers.
- 1Pick a roof style: 切妻 gable, 切妻(開き) open gable, 寄棟 hip, 方形 pyramid, 入母屋 irimoya, 片流れ shed, 招き屋根 saltbox or 陸屋根 flat.
- 2Set the shape: pitch (steepness), eaves overhang and plate thickness.
- 3Set the placement: rotation in degrees, height offset, and left/right or front/back nudges.
- 4Add the trim you want — ridge cap (棟包み), barge board (破風板) — and choose the colour.
- 5Each setting has its own ? button next to its label with a full explanation.
Tip: Change any value and the preview updates instantly on top of your actual model — press Add roof (or Apply changes) once it looks right.
Roof parts (役物)
Add a single roof ornament — ridge, ridge tiles, onigawara, eave tiles, tile courses, barge board — as its own component.
- 1Press New roof part to open the editor.
- 2Choose what it fits to: an existing generated roof, or the flat top of the model. The part is shaped to that host's slope.
- 3Pick the part. Parts that don't apply to the host's roof style are greyed out.
- 4Set the count (for parts that repeat), colour, height offset and left/right or front/back nudge — the preview updates on your actual model.
- 5Press Add part. It becomes its own component you can rename, show/hide, duplicate, export and unfold separately.
Tip: Very thin parts (eave tiles, tile courses, vertical tiles) unfold into tiny tabs at small scales — increase the model scale before unfolding them.
Placement on model
A top-down view for fine-tuning exactly where the roof sits on the building.
- 1The red outline is the roof. In Move mode, drag its centre to slide it left/right and front/back.
- 2Switch to Resize mode to drag a corner and change the roof's footprint — the opposite corner stays put.
- 3The outline rotates with the roof, so resizing always happens along the roof's own edges, even at an angle like 25°.
- 4Changes are saved when you release the pointer; the roof mesh is then rebuilt to match the new size and position.
Tip: If the roof drifts off, switch back to Move mode and drag the outline back over the building.
Dimensions
Set the real-world size and the model scale.
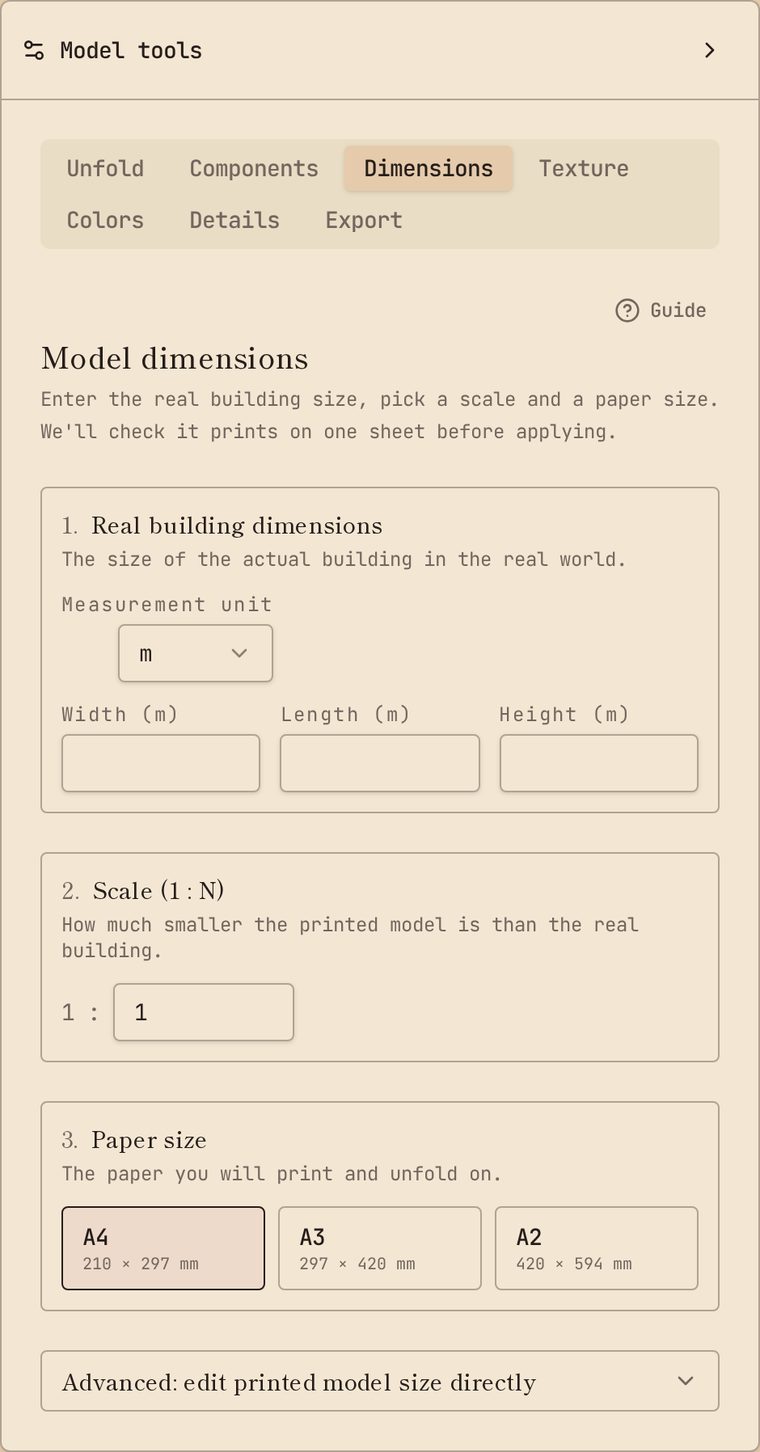
- 1Enter the real building dimensions, or keep the detected ones.
- 2Choose a scale (for example 1:150) or let it be calculated automatically.
- 3Save — the new scale is used by unfolding, face sheets and printed output.
- 4Don't forget to click “Apply size & regenerate model” after setting the dimensions and scale, or the model won't update.
Tip: Your saved scale is what the Unfold history and PDF sheets report.
Texture
Generate realistic materials for the model with AI.
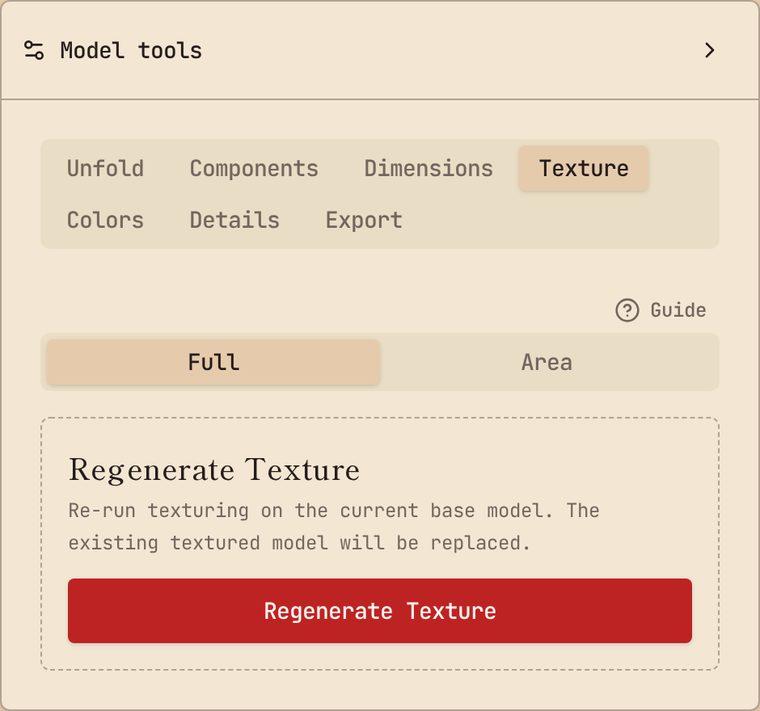
- 1Full: retexture the whole building from a description and optional references.
- 2Face: texture one or more specific faces with their own instructions.
- 3Area: draw a rectangle on a face and texture only that region.
Tip: Texturing runs as a job. Avoid editing the model while it is running — your changes would be overwritten when the new texture arrives.
Full texture
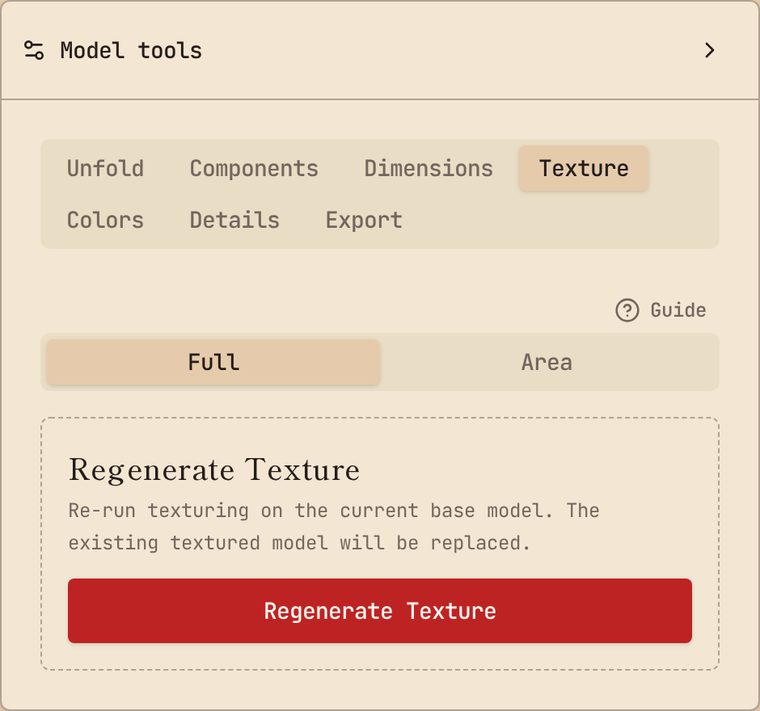
- 1Describe the building materials and style in plain language.
- 2Optionally add reference images to guide colours and materials.
- 3Regenerate — the whole model is retextured at once.
Tip: Be specific: “weathered grey concrete with dark aluminium window frames”.
Face texture
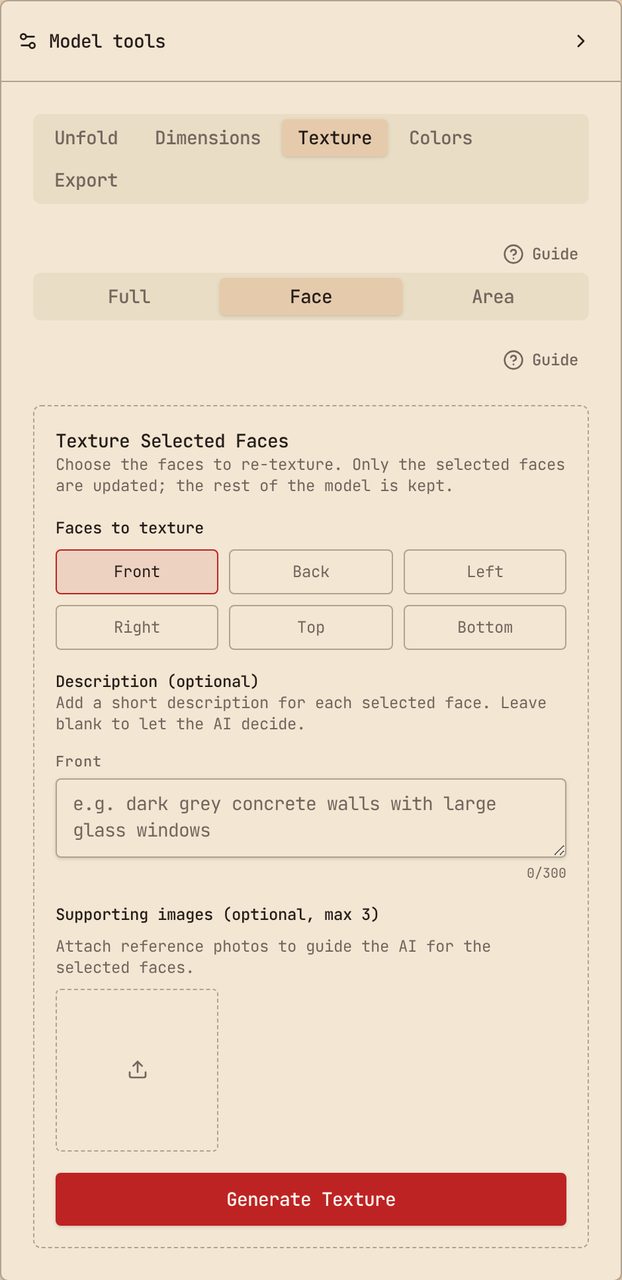
- 1Select the face or faces you want to change.
- 2Add a short instruction, and reference images if you have them.
- 3Regenerate — untouched faces keep their existing textures.
Tip: Use the view selector in the preview to look straight at a face before choosing it.
Area texture
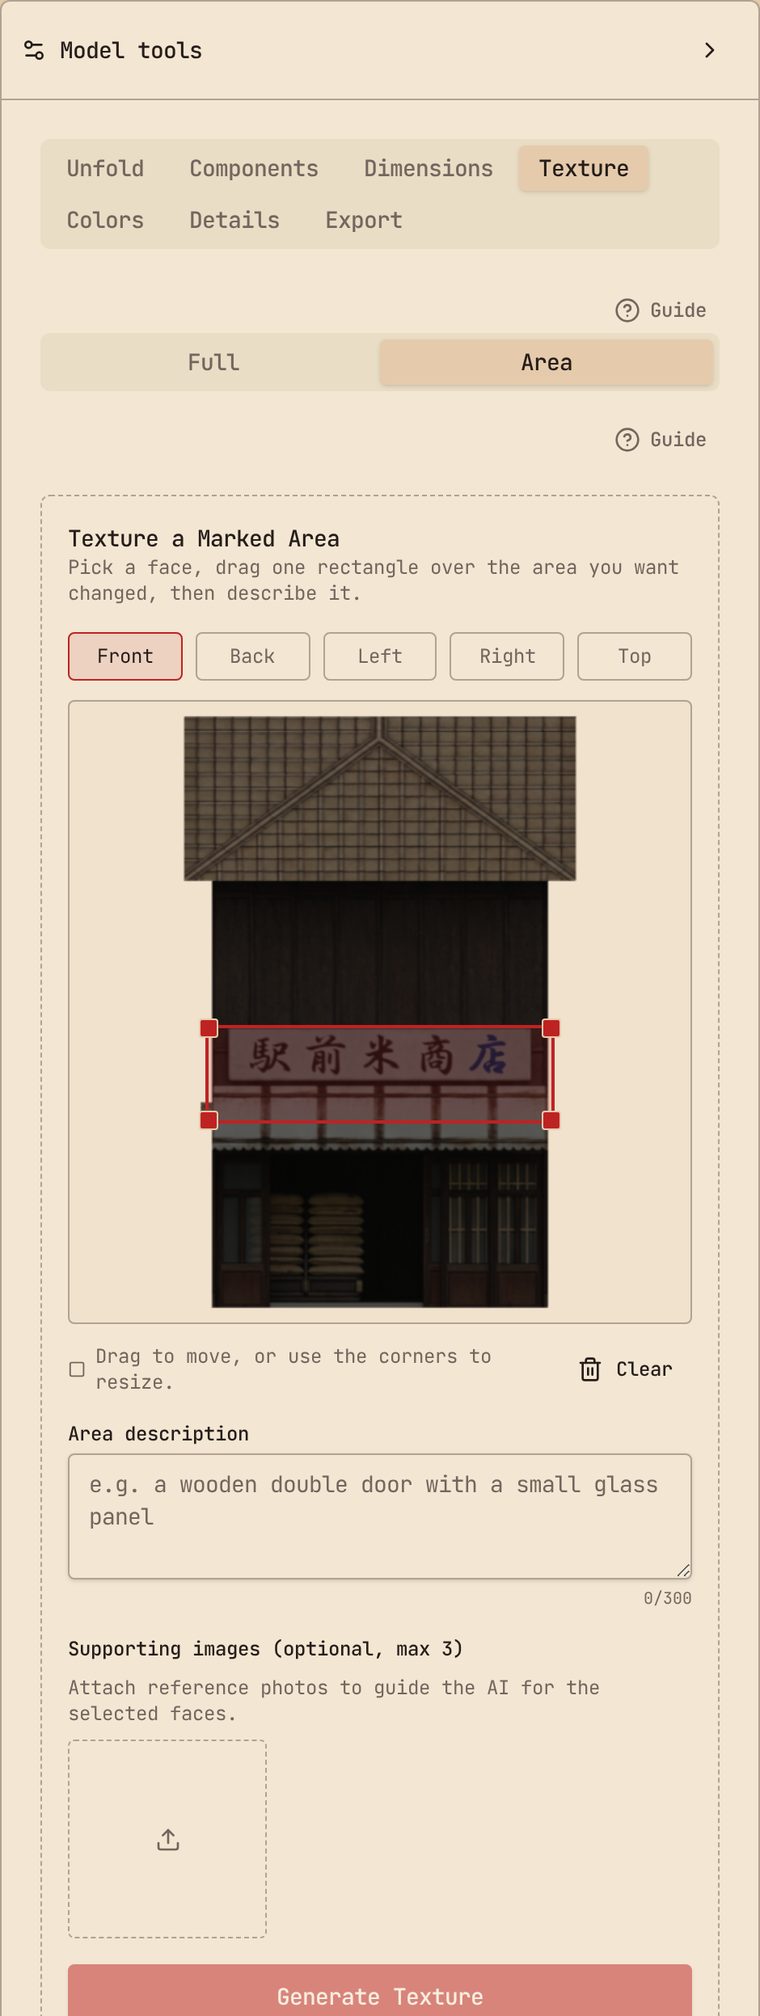
- 1Choose a face, then drag a rectangle over the region to change.
- 2Describe what should appear there; add up to three reference images.
- 3Regenerate — only the drawn area is affected.
Tip: Great for adding a shopfront, mural or signage to one part of a wall.
Undo texturing
Didn't like the textures the last run produced? Go back one step.
- 1Each successful texturing run saves the previous textures — one step only.
- 2Press Undo texturing in the Texture tab and confirm in the dialog.
- 3The model and its saved face textures return to the state before that run.
Tip: Only the most recent run can be undone, and the entry is cleared once you use it.
Colors
Adjust colours directly, without running an AI job.
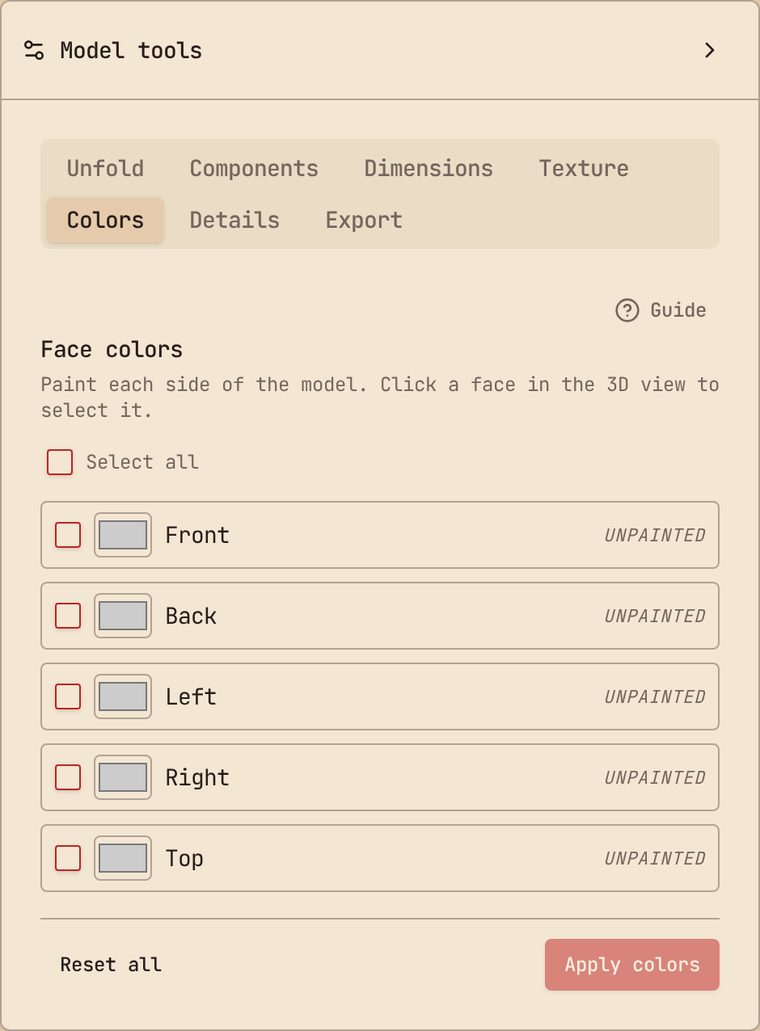
- 1Pick a surface or material from the list.
- 2Choose a new colour and see it applied instantly in the preview.
- 3Save to keep the change for unfolding and export.
Details
Metadata about this diorama.
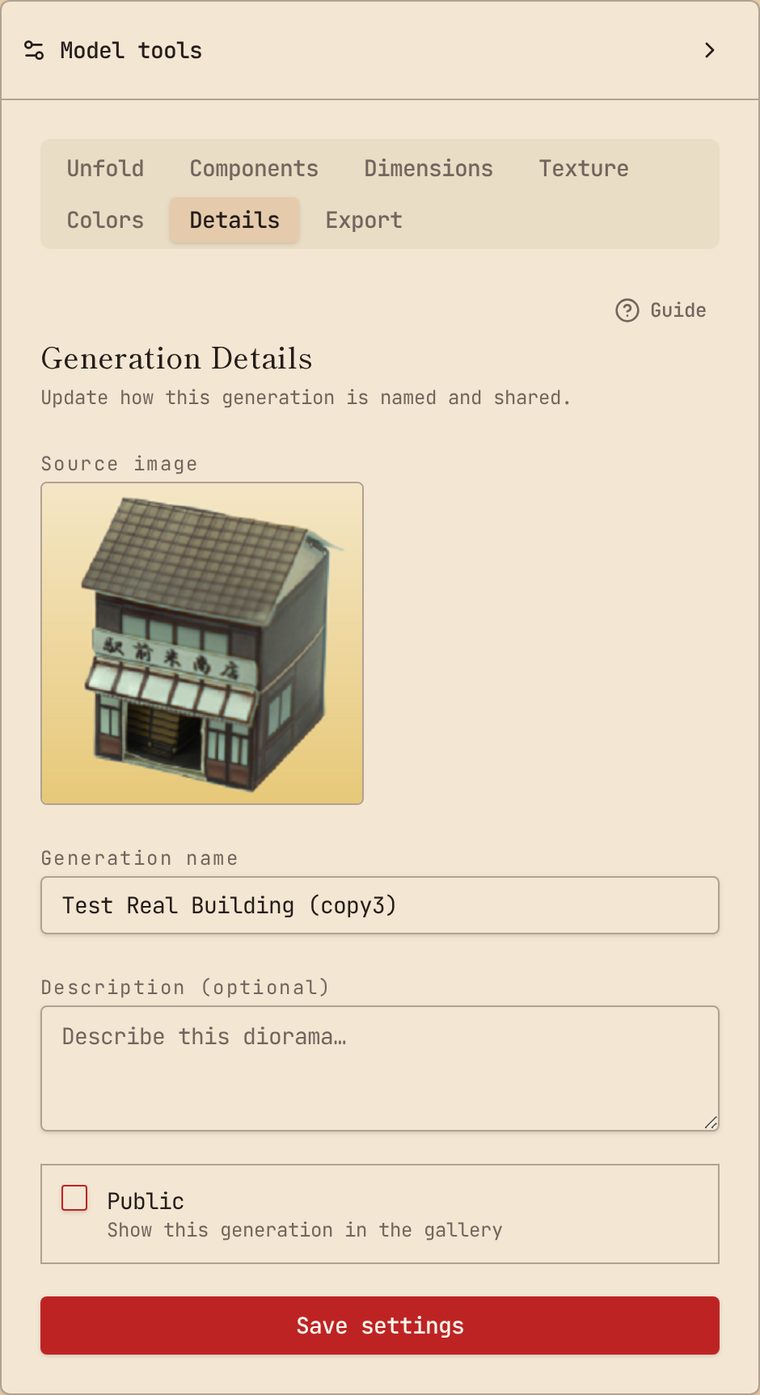
- 1Rename the generation and edit its description.
- 2Make it public to show it in the gallery, or keep it private.
Blocks
Split a building into separate blocks and work on them one at a time.
- 1Press Split Building to break the active model into blocks. Heavy models can take a few minutes.
- 2The Blocks tab is available on the full model and on the assembled model — splitting from the assembled model replaces the same set of blocks.
- 3Pick a block from the list to make it the active model — the preview and the remaining tabs then work on that block.
- 4Rename or download individual blocks, or delete a block you don't need (deleting asks for confirmation).
- 5When a block is active you get the Unfold, Cut and Export tabs. Cut and Refine write straight back to that block's model; there is no snapshot, so regenerate the blocks to get the original back.
- 6Clicking a block in the list highlights it in the 3D preview, and clicking a block in the scene selects it in the list.
- 7Block exports follow your plan's format limits, the same as the full model.
- 8Use Regenerate blocks on the full model to split again; this replaces the current blocks.
Tip: Splitting is useful for large buildings: smaller blocks unfold onto fewer sheets and are easier to assemble.
Block Studio
A page dedicated to blocks, where each block gets the full toolset without crowding the main workspace.
- 1Block Studio is a separate page for blocks, opened once the building has been split.
- 2Select a block and work on it on its own: add and place parts, cut, texture and set dimensions.
- 3Use Bake parts into block to merge a block's attached parts into the block model itself.
- 4Reassemble blocks merges the blocks — with their current textures — back into a single model.
Tip: In the main workspace an active block exposes the Unfold, Cut and Export tabs; parts, texture, dimensions and reassembly live here.
Export
Download what you need to build or reuse the model.
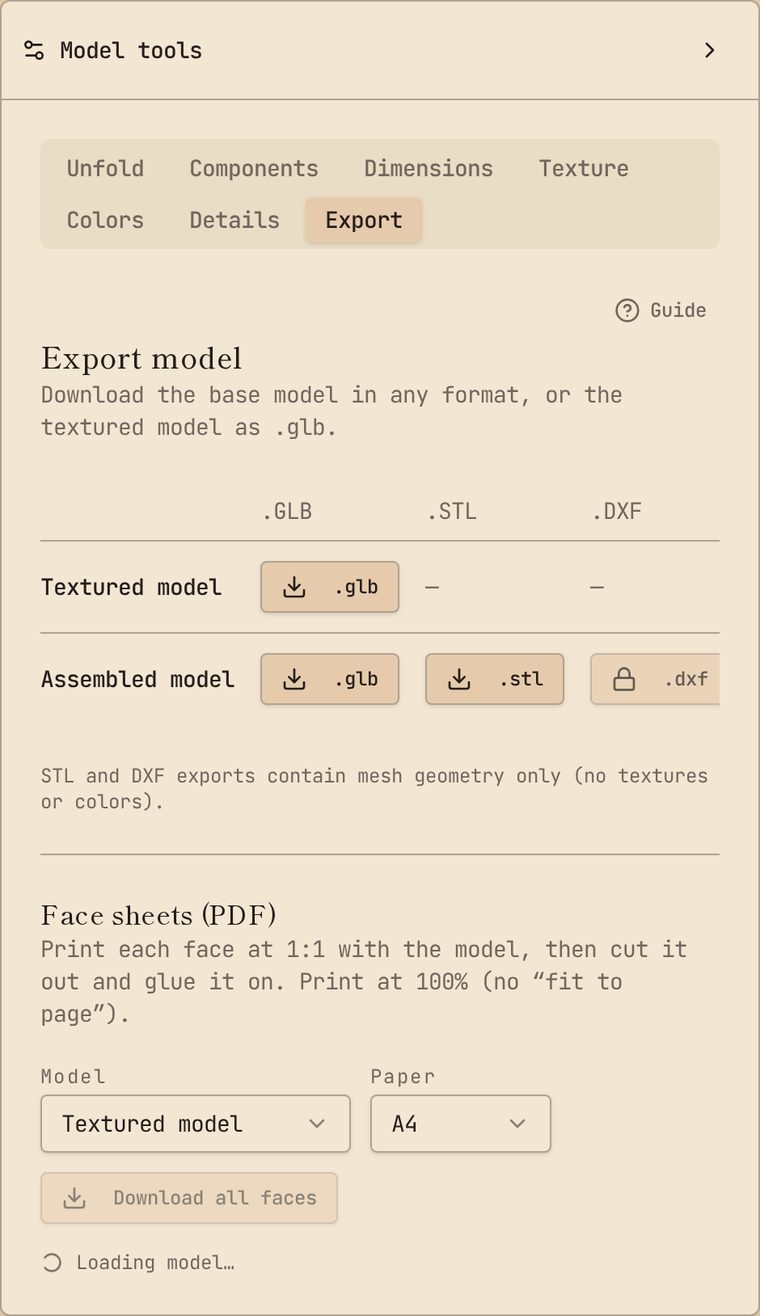
- 1Face sheets print each face at true scale on your chosen paper.
- 2Use face sheets to re-texture an already-built papercraft: print the sheets and glue them onto your assembled diorama instead of unfolding and rebuilding from scratch.
- 3If the building was split, each block gets its own section here so you can export or print that block on its own.
- 4The “Full” paper size makes one custom page that fits the face exactly, with no tiling — handy for large faces.
- 5Download the 3D model to use it in other software.
Tip: Print at 100% (no “fit to page”) so the printed scale stays accurate.